
Tips & tricks
Get the tenon fit right
Print a few test connectors with your production material and slicer profile before filling a whole plate.
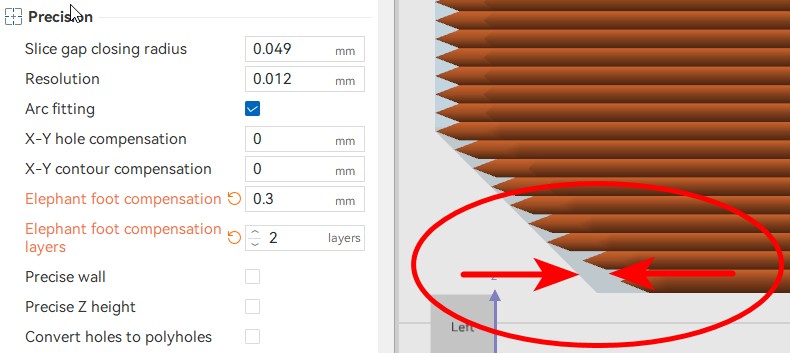
1. Correct elephant foot
Start with the flat connector template in the Split3r Tenons folder. The first-layer bulge can make an otherwise correct connector too tight.
As an initial test, try 0.30 mm over at least two layers of elephant-foot compensation. Inspect the underside. If it still flares, adjust by 0.05 mm or add a compensated layer. Tune to your printer, material and slicer.
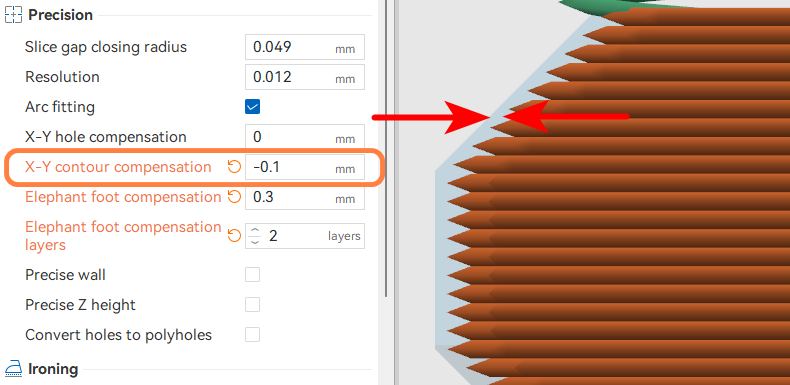
2. Tune XY compensation
| Test result | Next adjustment |
|---|---|
| Too tight or spreads the joint | Try negative XY compensation on the connector, starting around −0.05 mm. |
| Loose or wobbles | Try +0.05 mm on the connector, or reduce the socket clearance. |
Repeat until insertion is firm and smooth without pushing the parts apart. Slicer labels and the sign of hole-specific adjustments can differ; check the resulting geometry.
3. Check across the bed
Test five or six connectors across the bed, including the center and edges. Keep the successful material, profile and compensation settings for the production run.