
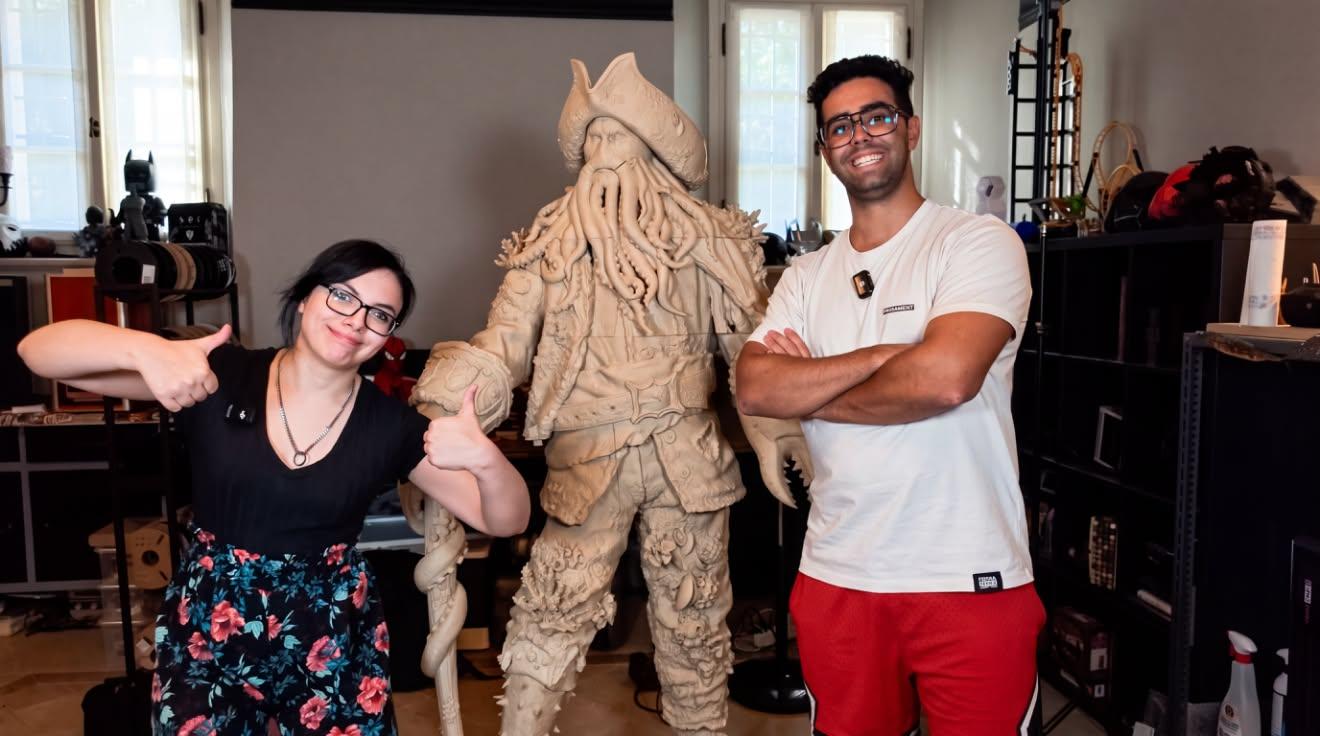
Two crafts around one character
After a first collaboration on a Predator, Nicola and Nora wanted to move on to a bigger and more complex project. Nicola brings his 3D printing experience. Nora, used to painting resin prints, takes charge of preparing the finishing and the colouring.
Her choice falls on Davy Jones for the richness of its textures: the tentacles, the relief of the face and the folds of the clothes offer plenty of scope for work. The goal is to combine several painting techniques to get a realistic result.
But before painting, the digital model has to be turned into a set of parts that can be printed and assembled.
Splitting with assembly already in mind
For Nicola, the split has to make printing easier. For Nora, it also has to preserve the details and put the seams where they will be easier to hide. The preparation of the model takes both needs into account.
Nick uses Split3r to subdivide the model according to the size of the build plates. The software also prepares alignment pegs, printed separately, whose dimensions can be adjusted. These pegs are then used to position the parts during assembly.
Some parts call for a different approach. For the head, Nora works in another program aimed at resin printing and follows the anatomy of the character. She wants in particular to preserve the tentacles and the upper part of the lips. The seams can then be filled with putty in the folds and hollows of the model.
The hands, the feet and other elements are also split in ways designed to ease printing and hide the joints. Split3r thus takes part in a preparation that combines subdivision suited to the plates with specific work on the most detailed areas.
About fifty parts on ten Prusa XL printers
The model is scaled up to 650% of its original size. Before starting the prints, Nicola estimates the material needed in OrcaSlicer, using a virtual printer large enough to hold the whole model. He makes this estimate without supports.
The estimated need comes close to 50 kg of material. It is a preparation estimate, not a measure of the project’s final consumption.
The parts are printed in PLA, with a 5% gyroid infill, on ten Prusa XL printers. Their 36 × 36 cm beds keep the number of subdivisions down, and therefore the number of seams to rework afterwards.
Nick announces a printing period of about two weeks, with pauses while he is away. Each part gets its own preparation, in particular for supports. On large overhanging areas he favours classic supports to reduce the risk of failure, even though this uses more material.
From support removal to the first assembly
Removing the supports takes two afternoons. The parts are then assembled with the alignment pegs and a plastic glue; Nick specifies that it is cyanoacrylate.
A little hot glue is also used in places for the presentation assembly, before the statue is taken apart and shipped to Nora’s workshop.
The project also has repairs ahead. Some details were damaged while removing the supports, after support failures or during transport. Nora plans to rebuild the small missing elements, coral in particular, with a sculptable epoxy putty.
The project video, part one
On Nicola’s channel, in Italian: preparing the model, printing on the ten Prusa XL printers and the first assembly. Nicola’s quote, further down, is translated from it (3:27 to 3:31).
What comes next is the finishing
At the end of this first video, the statue is printed and shown assembled. The finishing and the painting remain to be done and are announced for the next episodes.
Nora has to rework the joints, repair the details and work on the colours and textures. The preparation of the cuts then makes full sense: the seams placed in the folds of the model can become part of the finishing work.